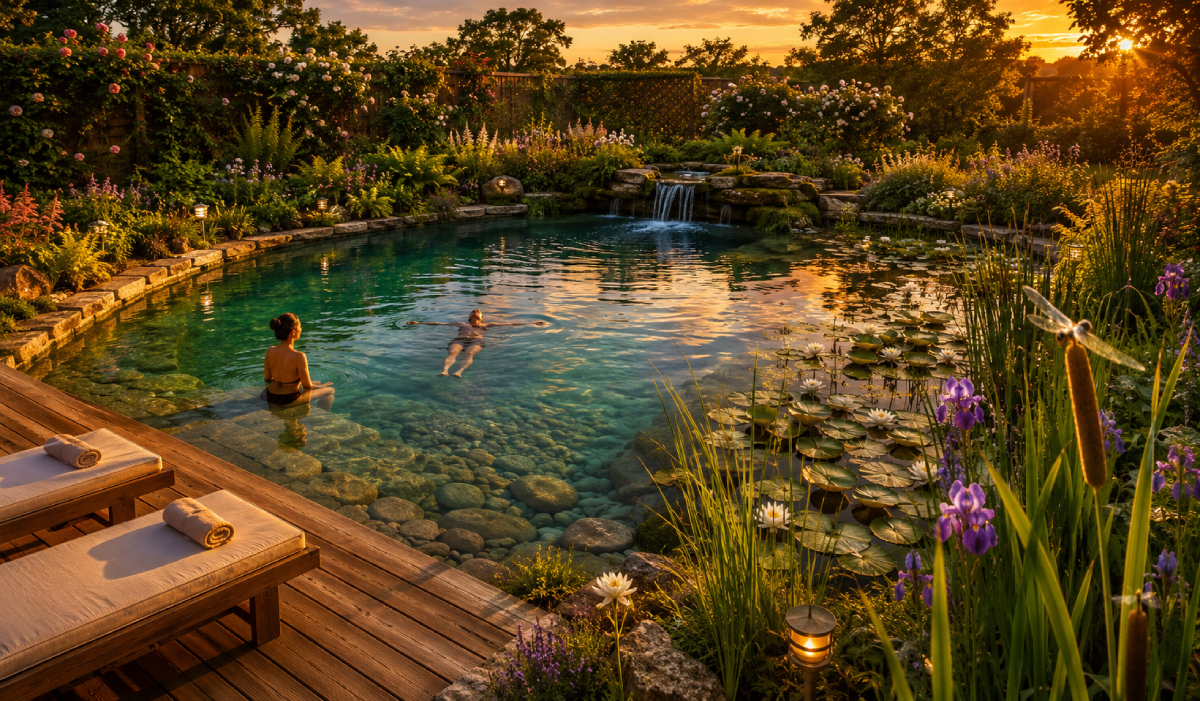

A freshwater DIY pool is one of the most rewarding backyard projects you can build. It looks nothing like a standard chlorine pool. It looks like a pond that someone decided to swim in — and it feels that way too.
The water is clear and clean without chemicals. Plants do the filtering. Sunlight warms it naturally. And once the ecosystem finds its balance, the whole thing runs itself.
These 20 freshwater DIY pool ideas take you through everything — planning, building, planting, and maintaining a backyard swim pond that genuinely works.
🪣 1. Start Small With a Stock Tank Pool
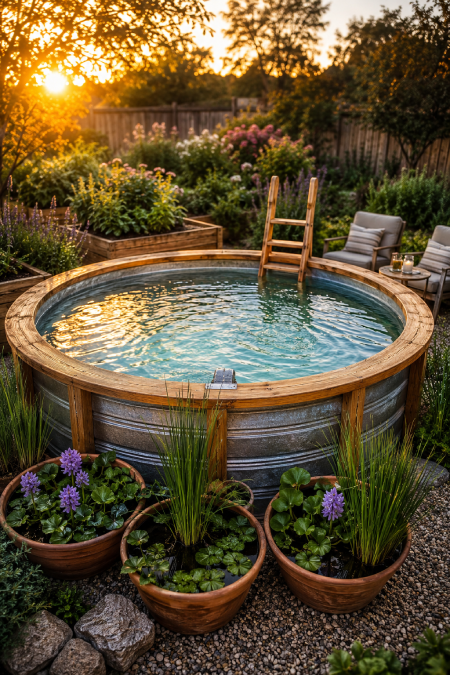
A stock tank pool is the easiest entry point into freshwater swimming. No digging required.
- Choose a galvanized steel stock tank of at least 8 feet in diameter — smaller tanks feel too cramped for comfortable swimming
- Add a small submersible pump to keep water circulating and prevent stagnation
- Place two or three potted aquatic plants around the tank rim — they filter the water and make the tank look intentional rather than industrial
- Disguise the metal sides with bamboo screening, stacked stone, or timber cladding for a more natural appearance
- This is the best small freshwater pool idea for renters or anyone not ready to dig — the tank is movable and fully reversible
A stock tank pool proves that freshwater swimming doesn’t require a major construction project.
☀️ 2. Choose the Right Spot Before You Dig Anything
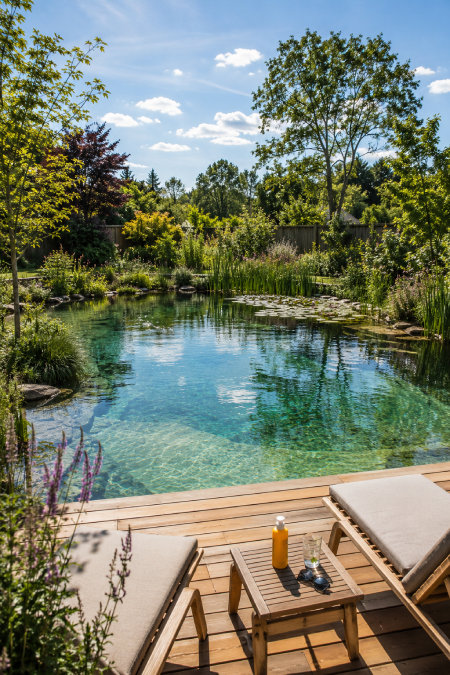
Location determines whether your natural swimming pool DIY project succeeds or struggles from day one.
- Choose a spot with at least six hours of direct sunlight daily — sunlight warms the water naturally and supports the beneficial bacteria that keep it clear
- Avoid low-lying areas where rainwater runoff collects — excess nutrients from garden soil entering the pool fuels algae blooms
- Stay at least 10 feet from trees with aggressive root systems — roots can puncture the liner over time
- Check the ground for underground utilities before any digging — most areas have a free utility marking service
- A backyard freshwater pool on flat ground is significantly easier to level, line, and maintain than one on a slope
Choosing the right spot saves more time and money than any other single decision in this project.
🏊 3. Design Two Zones — a Swim Area and a Regeneration Area
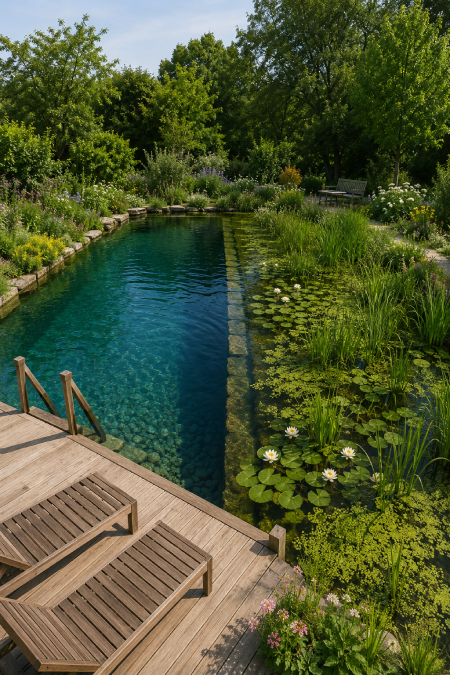
Every successful DIY natural pool backyard project is built around two distinct zones working together.
- The swim zone is the deep, clear section — typically 4 to 6 feet deep — where you actually swim
- The regeneration zone is shallower — 12 to 24 inches deep — and filled with gravel and aquatic plants that filter the water
- Divide the two zones with a submerged stone wall or timber frame that sits just below the waterline
- Water flows from the swim zone into the regeneration zone, gets cleaned by the plants and gravel, and returns clean
- The regeneration zone should be approximately 50 percent of the total pool surface area for effective natural filtration
Understanding the two-zone system is the most important concept in freshwater pool design.
🛡️ 4. Use a Quality EPDM Pond Liner That Actually Lasts
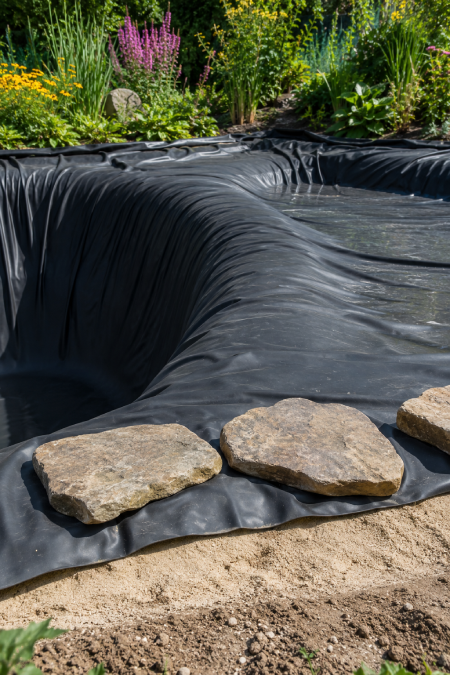
The liner is the single most important material purchase in any DIY pool without chemicals build.
- EPDM rubber pond liner is the best choice — it is flexible, UV-resistant, fish-safe, and lasts 20 or more years when correctly installed
- Calculate liner size by adding twice the maximum depth to both the length and width measurements, plus 2 feet of overlap on each edge
- Lay the liner on a base of soft builder’s sand at least 2 inches deep — sand protects the liner from sharp stones underneath
- Smooth all folds to the edges before anchoring — folds in the middle of the liner collect debris and are difficult to clean
- Secure the liner edge with flat stones or timber edging — never leave liner edge exposed to UV without covering
A cheap liner false-economizes — a puncture means draining and relining the entire pool.
🪨 5. Layer Gravel for Natural Biological Filtration
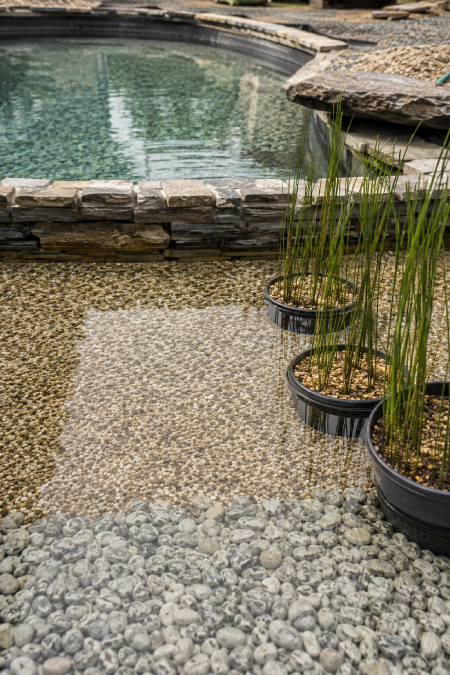
Gravel is the biological engine of a DIY swim pond — it hosts the bacteria that actually clean the water.
- Use two layers — coarse gravel (20-40mm) at the bottom and finer gravel (10-20mm) on top — the two layers filter at different scales
- Wash all gravel thoroughly before placing it — unwashed gravel clouds the pool water for weeks
- The gravel goes in the regeneration zone only — the swim zone has a sandy or stone floor for comfortable swimming
- Over 4 to 8 weeks, beneficial bacteria colonize the gravel and begin breaking down organic matter naturally
- Add more gravel to the regeneration zone annually — it compresses over time and loses some filtration capacity
Good gravel layering means the water cleans itself without any intervention from you.
⚡ 6. Install a Simple Low-Energy Pump System
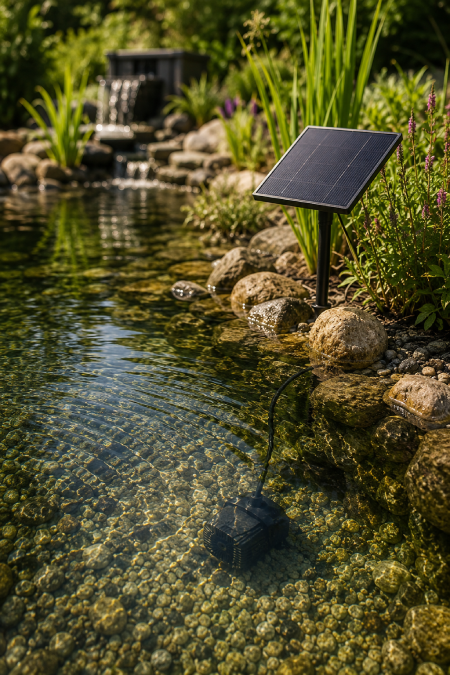
Even a fully planted chemical-free pool needs a pump to keep water moving between zones.
- A small pond pump rated at 1000 to 3000 litres per hour is sufficient for most DIY freshwater pools under 50 square meters
- Position the pump at the deepest point of the swim zone — it draws water from there and pushes it through the regeneration zone
- Solar-powered pond pumps eliminate running costs entirely — ideal for pools in full sun positions
- Run the pump continuously during the swimming season — stagnant water in any section leads to algae growth
- Check pump intake filters monthly during the swimming season and clean any debris blocking the flow
A small pump running continuously does more for water clarity than any chemical treatment.
🌿 7. Plant Hardy Aquatic Plants That Actually Filter
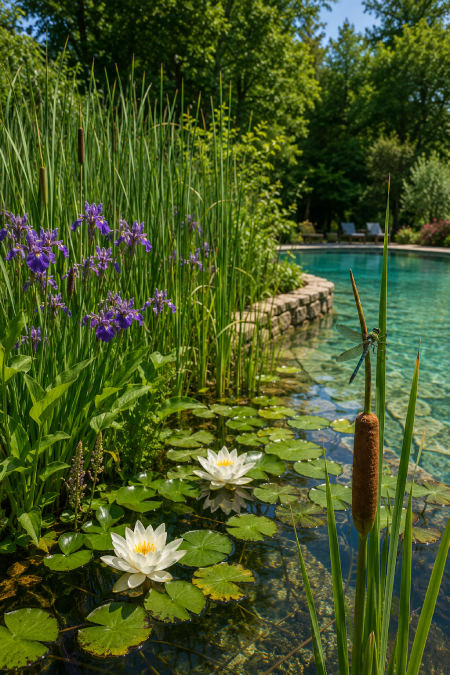
The right aquatic plants in the regeneration zone are what keep a natural swimming pool DIY genuinely clean.
- Cattails absorb phosphorus and nitrogen — the primary nutrients that feed algae
- Water lilies provide surface shade that limits algae growth in the swim zone
- Rushes and sedges oxygenate the water through their root systems
- Water iris adds beautiful seasonal color while actively filtering nutrients
- Plant in late spring when water temperature is above 50°F — plants establish faster and filter more effectively in warm water
Healthy plants in the regeneration zone mean less maintenance everywhere else.
🪨 8. Keep Pool Edges Natural With Stone and Groundcover
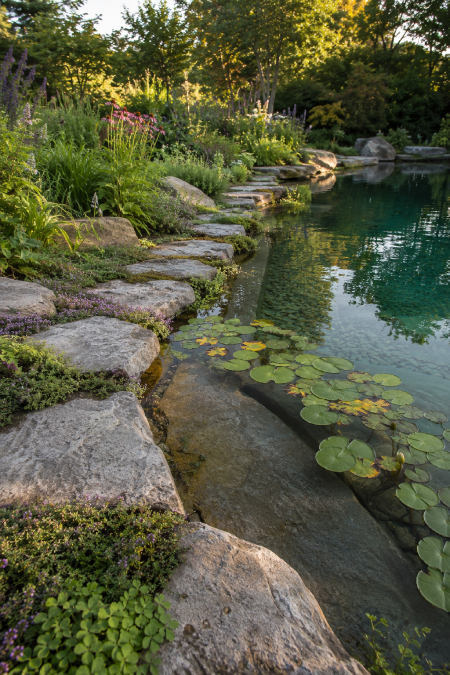
Natural edges make a freshwater DIY pool look like it belongs in the landscape rather than sitting on top of it.
- Use flat fieldstones or river rocks along the waterline — they anchor the liner edge and create a natural transition
- Plant low groundcover plants right to the water edge — creeping thyme, moss, and ajuga all suit wet conditions
- Avoid plastic edging, tiles, or concrete borders — they make the pool look like a conventional installation
- The goal is for the pool to look like it has always been part of the garden
- Add a few smooth river stones inside the pool near the edges — they feel pleasant underfoot and look completely natural
A natural pool with beautiful edges looks like a feature of the landscape rather than an addition to it.
🚰 9. Install an Overflow Drain Before Heavy Rain Season
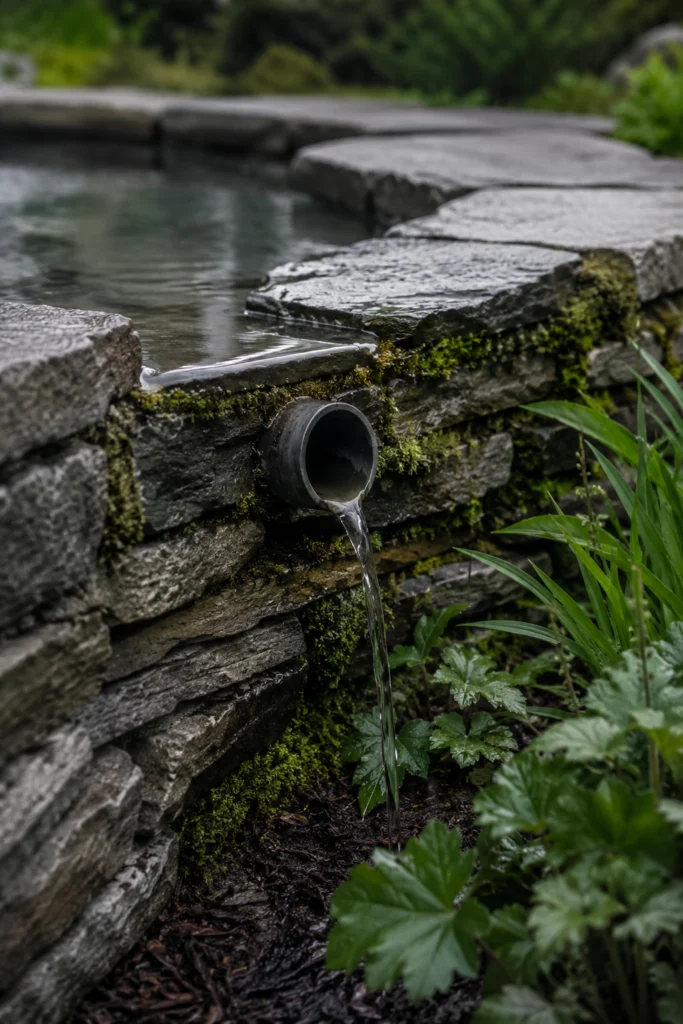
Every backyard freshwater pool needs overflow management — rain fills pools faster than most people plan for.
- Install a simple overflow pipe at the desired maximum water level — when water rises above it, excess drains automatically
- Direct overflow water to a garden bed, rain barrel, or permeable gravel area — never to a storm drain
- The overflow pipe diameter should be at least 50mm — smaller pipes block with debris and overflow fails when most needed
- Place the outlet on the side of the pool opposite the regeneration zone — this prevents disturbing the planted filtration area during overflow events
- Test the overflow system with a garden hose before the first rain of the season
An overflow drain is the most overlooked detail in DIY pool planning and the most regretted omission after the first storm.
🪵 10. Add Timber Steps or a Simple Entry Deck
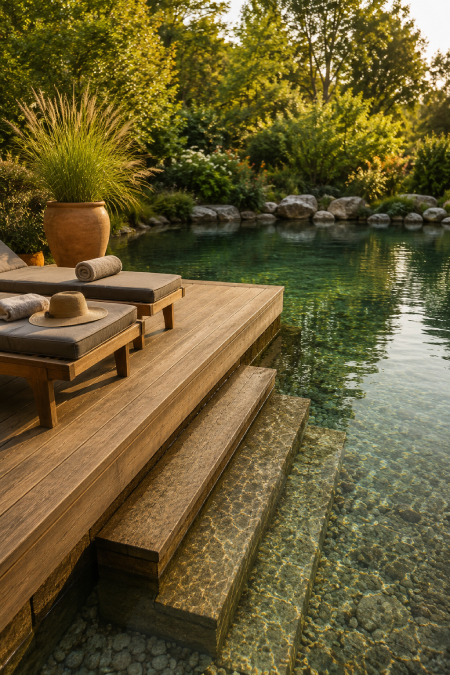
Getting into and out of a natural pool comfortably makes the difference between using it daily and avoiding it.
- Build a small timber platform flush with the pool edge — a 6 by 8 foot deck provides comfortable lounging and easy entry
- Use hardwood decking or composite boards — both handle moisture without rotting the way softwood does
- Submerged stone steps cut into the pool wall at the entry point make a more natural alternative to a metal ladder
- Position the entry point at the shallowest accessible edge of the swim zone — never at the deep end
- Two wide timber planks anchored at the pool edge and angled into the water create the simplest and most effective step-in solution
A small timber entry deck transforms a natural pool from a project into a destination.
📏 11. Get Pool Depth Right From the Start
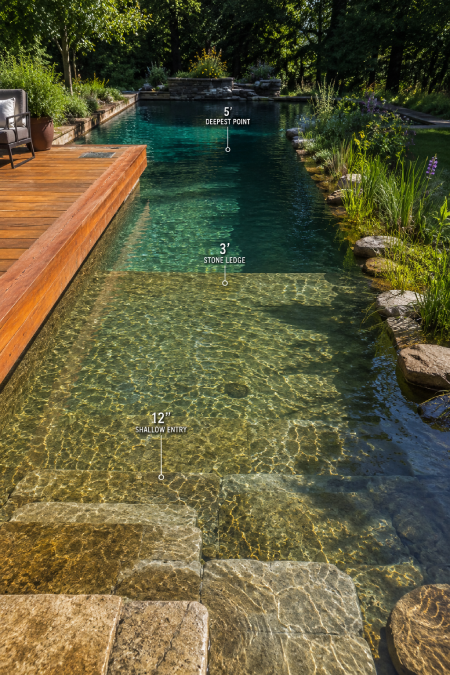
Depth affects safety, maintenance, and the swimming experience in a DIY swim pond.
- The swim zone needs to be at least 4 feet deep for comfortable adult swimming — 5 feet is the ideal for most users
- Create a gradual slope from the entry steps to maximum depth — sudden depth changes are dangerous and make cleaning harder
- The regeneration zone stays between 12 and 24 inches deep — deeper than this reduces plant effectiveness
- Mark depth changes with a visible submerged stone ledge — it helps swimmers gauge depth and is a useful resting point
- A gently sloped entry rather than a straight drop makes the pool more welcoming for nervous swimmers and children
Getting depth right during digging is far easier than correcting it afterward.
🧪 12. Never Add Chemicals to a Biological System
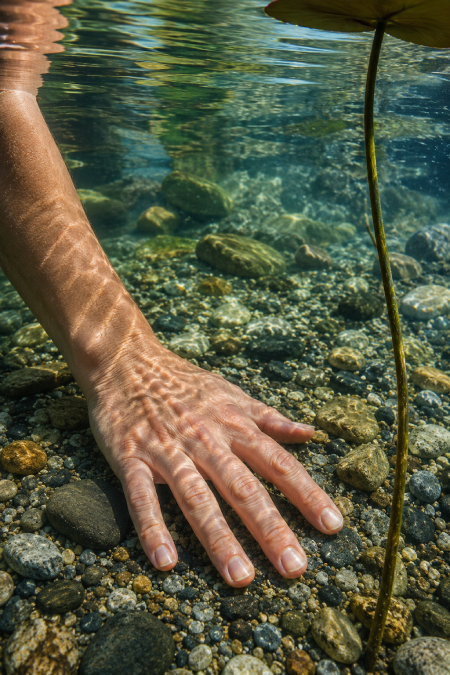
The most common freshwater DIY pool mistake is reaching for chemicals when the water looks off.
- Cloudiness in the first 4 to 8 weeks is completely normal — the biological system is establishing itself
- Adding chlorine during this period kills the beneficial bacteria and plants that are building the filtration system
- If algae appears, address the root cause — usually insufficient plants in the regeneration zone or too much direct sunlight on the water
- The only acceptable additions to a natural freshwater pool are beneficial bacteria starter cultures if the system is taking too long to establish
- Patience during the cloudy establishment period is the most important quality a freshwater pool builder can have
A chemical-free pool is a biological system. It needs time, not intervention.
☂️ 13. Use Shade Cloth to Control Summer Algae
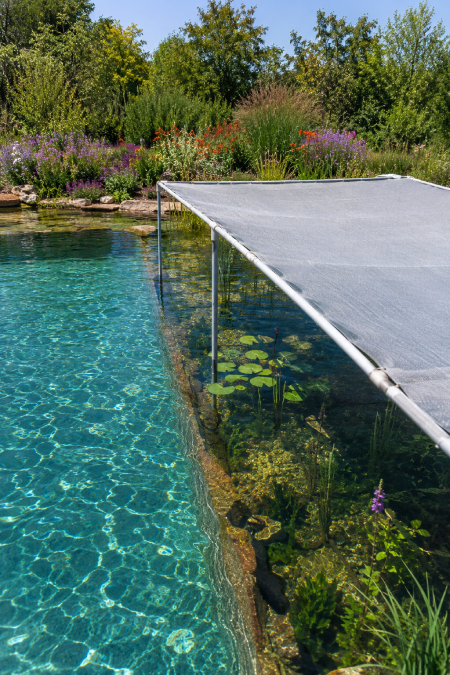
In hot summers, algae can overwhelm even a well-established natural pool design without intervention.
- Install a temporary shade cloth over the regeneration zone during the hottest weeks — it reduces water temperature by 5 to 8 degrees, which dramatically slows algae growth
- Use 30 percent shade cloth rather than heavier grades — you want reduced sun, not full shade, as plants still need some light
- Remove the shade cloth on overcast days — plants need maximum available light when sun is reduced
- Do not shade the swim zone — you want the swimming area warm and sun-filled
- A shade cloth frame built from simple PVC pipes takes an hour to build and can be stored when not needed
A temporary shade cloth is the most practical and lowest-cost algae control available.
💎 14. Add River Stones to the Pool Floor for Natural Feel
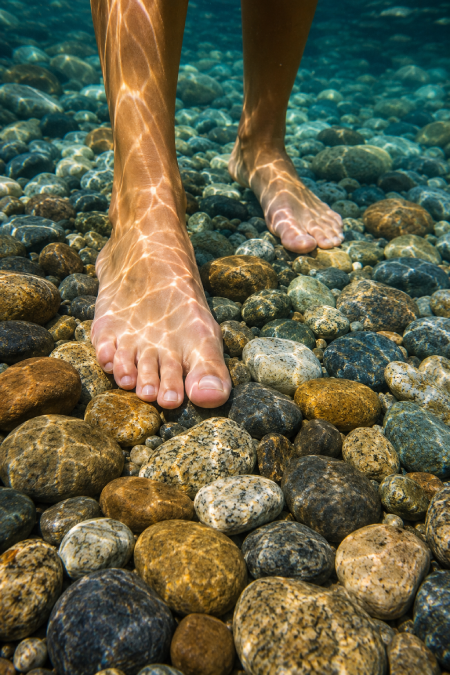
River stones on the pool floor turn a lined pool into something that genuinely feels like a natural swimming hole.
- Choose smooth river stones between 50mm and 150mm diameter — anything smaller becomes debris, anything larger feels uncomfortable underfoot
- Distribute stones unevenly across the swim zone floor — natural distribution looks better than organized placement
- Avoid sharp-edged stones — bare feet on rough stones quickly reduces how much the pool gets used
- The stones add thermal mass — they absorb warmth during the day and release it slowly through the evening
- Collect stones from your own property if available — it makes the pool feel genuinely connected to the land it sits on
River stones underfoot are one of the most sensory-rich features of a natural pool.
🍃 15. Keep a Hand Skimmer for Daily Surface Maintenance
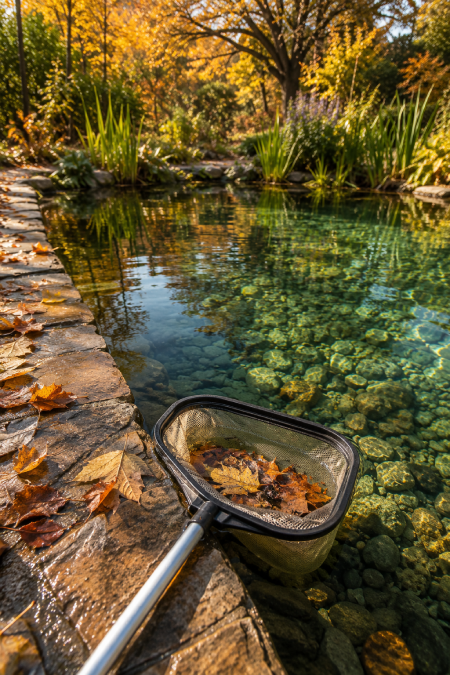
Even a perfectly balanced DIY natural pool accumulates surface debris that needs regular removal.
- A simple long-handled pool skimmer net removes leaves, insects, and pollen from the surface before they sink and decompose
- Skim daily during leaf-fall seasons — decomposing leaves release nutrients that feed algae
- A skimming routine takes less than five minutes and prevents the majority of water quality issues
- Install a simple surface skimmer box connected to the pump intake — it automatically removes surface debris without daily manual effort
- Position the manual skimmer handle within reach of the pool at all times — convenience determines how consistently the task gets done
Daily skimming prevents weekly problems and monthly headaches.
🧬 16. Test Water Monthly to Stay Ahead of Problems
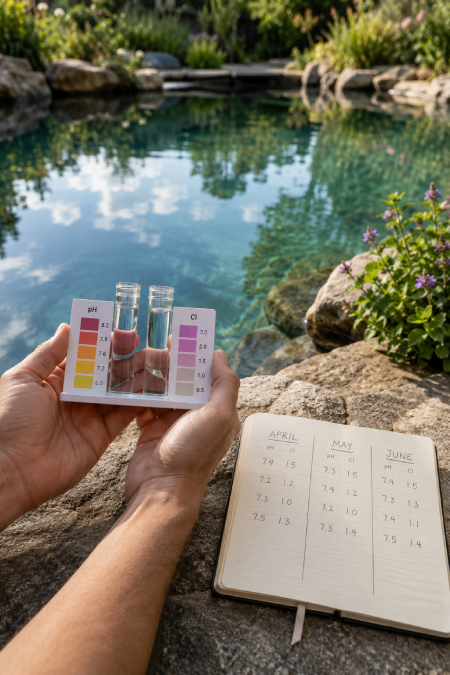
Monthly water testing catches imbalances before they become visible problems in your eco-friendly pool.
- Test pH monthly — the ideal range for a natural swimming pool is 6.5 to 7.5
- A pH below 6.5 can be raised naturally by adding crushed limestone to the regeneration zone
- A pH above 7.5 often indicates too little biological activity — check plant health and pump operation
- Clarity testing is simple — lower a white plate to 2 meters and check if it remains visible
- Basic test kits cost under $20 and take 5 minutes — the most cost-effective maintenance tool available
Monthly testing gives you control over the system without daily intervention.
❄️ 17. Prepare Your Freshwater Pool for Winter
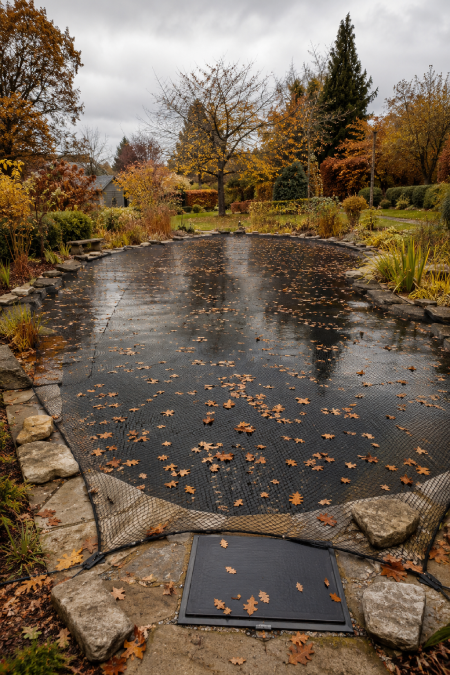
A backyard freshwater pool handled correctly in autumn needs almost no intervention until spring.
- Stop the pump when night temperatures consistently drop below 40°F — running a pump through freezing temperatures risks pipe and pump damage
- Let aquatic plants die back naturally — do not cut them down, as the dead stems protect plant crowns through winter
- Cover the pool with a fine mesh net to catch leaf-fall debris — it dramatically reduces spring cleaning workload
- Remove the mesh in late winter before spring plant growth begins — trapped early spring growth under a mesh causes plant damage
- Drain pumps and store them indoors — a freeze-cracked pump costs more than a new one
A properly winterized natural pool is fully swimming-ready again within two weeks of spring.
🗓️ 18. Build a Simple Seasonal Maintenance Routine
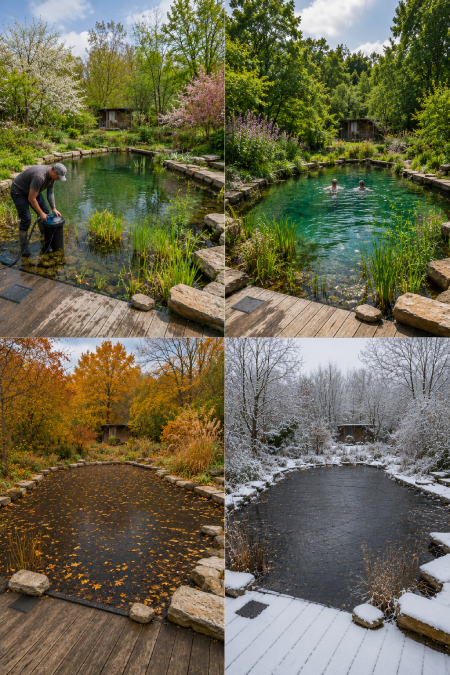
The most successful freshwater DIY pool ideas share one thing — a simple, consistent maintenance routine.
- Spring — reinstall the pump, trim dead plant material, top up water level lost to winter evaporation, add beneficial bacteria starter
- Summer — skim daily, check pH monthly, trim plants that are encroaching into the swim zone, check pump intake filters
- Autumn — install the leaf net, reduce pump runtime as temperatures drop, prepare the pump for winter storage
- Winter — stop the pump, store it indoors, check the mesh net after storms
- Total annual maintenance time for a well-established natural pool is approximately 4 to 6 hours — significantly less than a chlorine pool
A natural pool that is routinely maintained is a pool that stays beautiful indefinitely.
🌊 19. Add a Small Waterfall or Stream for Aeration
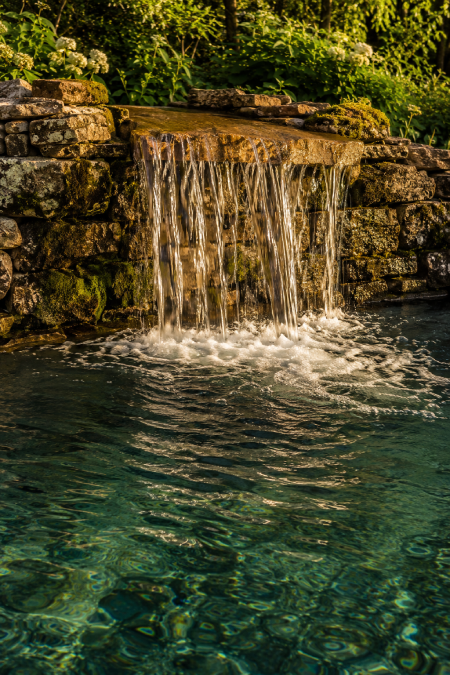
Moving water entering a natural swimming pool adds oxygen, improves clarity, and sounds extraordinary.
- A simple waterfall built from stacked flat stones at one end of the pool aerates the water as it falls
- Even a 12-inch waterfall height creates enough turbulence to meaningfully oxygenate the water
- Connect the waterfall inlet to the pump outlet — the same pump that runs filtration can power the waterfall at no extra energy cost
- Position the waterfall at the end of the pool opposite the regeneration zone — the movement draws oxygenated water across the full swim zone
- The sound of moving water makes spending time near the pool as enjoyable as swimming in it
A small waterfall costs almost nothing to build and adds more atmosphere than any other pool feature.
🌄 20. Create a Beautiful Poolside Seating and Landscaping Zone
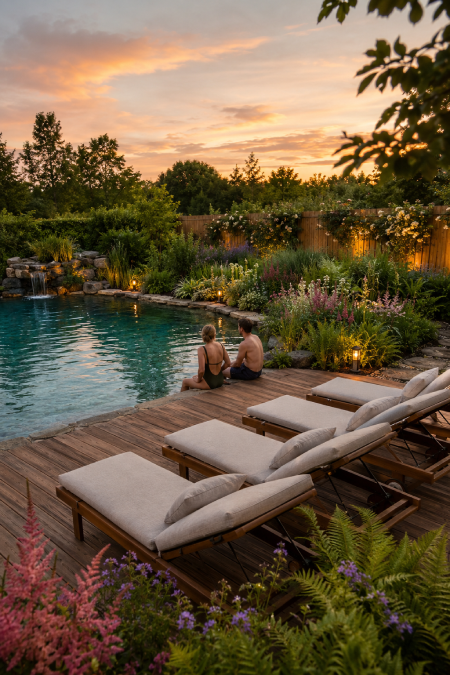
A natural pool without a beautiful surrounding landscape is a missed opportunity.
- Build or position seating within 6 feet of the pool — you want to feel beside the water, not across the garden from it
- Use natural materials for all poolside furniture — timber, stone, rattan, and woven materials suit the natural pool aesthetic
- Plant perennial borders right to the pool edge — hardy geraniums, astilbe, and ferns all handle the splashing moisture
- Add solar-powered path lights along the pool edge for safe and atmospheric evening use
- A large flat stone or timber slab at the pool edge serves as a perfect natural diving platform for shallow entry jumps
The landscape around a natural pool is as important as the pool itself.
🛠️ Quick Practical Guide
Minimum requirements for a working freshwater pool:
- Pond liner (EPDM, correctly sized)
- Small pond pump (1000 to 3000 litres per hour)
- Gravel filtration layers in the regeneration zone
- Aquatic plants — minimum 5 species for effective filtration
- Surface skimmer (manual or automatic)
- Overflow drain
Rough cost breakdown:
- Stock tank setup — $200 to $600
- Small DIY swim pond (under 30 square meters) — $1,500 to $4,000
- Medium DIY swim pond (30 to 60 square meters) — $4,000 to $10,000
- Costs vary significantly by location, soil type, and materials chosen
Common mistakes and how to avoid them:
- Adding chemicals when water goes cloudy — wait 8 weeks for biological establishment
- Building in too much shade — minimum 6 hours direct sun daily
- Skipping the overflow drain — install before the first rain
- Under-planting the regeneration zone — plants are the filtration system, use plenty
- Choosing the wrong liner — only EPDM or purpose-made pond liner
Timeline from start to swimming:
- Week 1-2: planning, marking, excavation
- Week 3: liner installation, gravel laying
- Week 4: pump installation, initial filling
- Week 5-6: planting, system establishment
- Week 7-12: biological maturation period — water clears progressively
- Week 8-12: Swimming begins once water clarity is established
2